Get Complete Project Material File(s) Now! »
Project Requirements
During the design process, several different ideas were developed. Several ideas were rejected very early on, often during the initial sketching, as they did not meet the requirements of the project. The requirements of the project were as follows:
• Use of the Microsoft Kinect
• Interface based on natural user interaction, using gestures
• Visually appealing design
• Easy to learn, as it will be used on trade shows where nobody has the time or patience to spend any time on trying to learn how to interact with a system.
• Should be able to present any type of information to the user. This may include, but is not limited to, images, sound, videos and even other software.
State of the Art Overview
When researching the Kinect on libraries like IEEE and ACM it becomes clear very quickly that an astonishing amount of research is being done with this piece of hardware which was originally only created as an innovative game controller. If then narrowing down the search towards gesture recognition and its possible uses it quickly becomes obvious that while there are many papers on the topic of how to technically detect gestures, there are surprisingly few papers on the actual implementation and usage of said gestures. Examples of these technical papers are Biswas and Basu (Biswas & Basu, 2011) and Lai, Konrad and Ishwar (Lai, et al., 2012).
Vera et al. (Vera, et al., 2011) describe a system where they combine several sensors into a augmented reality experience. They use two Kinect devices for capturing a user’s location, a gyroscope in form of an Android smartphone to track head movements, a WiiMote for facial expressions and a microphone capturing the voice of the user which is then used to calculate lip movement on basis of an amplitude based algorithm. Using the data provided by these sensors, the user can interact with the virtual character on screen, for example they can walk around him or talk to him. This project requires a user to put certain equipment on specifically to interact with the system and is therefore not a pure natural interaction system. This system has been used successfully at a marketing presentation for touristic content (FITUR ‘11). This is especially interesting as the project described in the documentis also planned to be used at marketing presentations and trade shows
One of the most important websites that shows off actual projects done with Kinect is called Kinect Hacks (Kinect Hacks, 2012). It offers videos of countless different projects and even has a Top 10 of the current best projects.
One of these projects is currently in use at the World of Coca-Cola museum in Atlanta, GA (Kinect Hacks – Protecting The Secret, 2012). It allows tracking of several users at once who can then playfully use gestures to interact with all kinds of objects on screen to find new information about the company and their products. In one of the games the users can play they need to find the combination to a vault containing Coca-Cola’s secret. This can be observed in the video on the website from about timestamp 1:18. At about 1:24, users can be observed making large gestures trying to turn the knobs of the combination lock. They instantly understand what to do without the need of any sort of explanation from the system. Understanding the system without the need for explanation is a very important concept and something that needs to be incorporated into the current project as well.
Another very impressive project that combines augmented reality and gestures into what is called a “god game” is called “Kinect-powered Augmented Reality Sandbox”. With this system, a user can play in a sandbox while the system projects contours onto the sand in real time. With a certain gesture, virtual water can then be poured into the sandbox which will react to the structure of the sand in the sandbox (Kinect Hacks – Augmented Reality Sandbox, 2012). Interesting about this project is the seamless connection between the real sandbox, the virtual contours and water, and the gestures to combine it all.
The project KinectJS (Kalogiros, 2012) attempts to combine JavaScript and Kinect to interact with a website, with the ultimate goal of bring motion controls into HTML5. The website shows a couple of videos of a user interacting with a website and playing games on it. The gestures are simple and often require large movements. Unfortunately the general user interface is not tailored to natural interaction but is in fact strongly inspired by Microsoft’s Metro UI which will be introduced in Windows 8. Instead of using natural gestures, the user still needs to click on items, which in this specific implementation seems to be done through hovering over a button for a certain amount of time. This interrupts work flow and can also potentially be tiring for the user due to the requirement of holding his arm still in an unusual position. For the current project, KinectJS essentially shows how not to do it, as they attempt to control a standard user interface with gestures instead of developing a user interface tailored to the needs of gestural controls.
A project of a different kind is “Cauldren – Gestural Performance Piece” (Kinect Hacks – Cauldren, 2012), where all gestures and movement captured by the Kinect are used to create an audio-visual experience. All movement data is converted into MIDI, which is then played as sound. This means that fast movement makes for different sounds than slow movement for example. This is accompanied by stylized fireworks that follow the user’s hand movements and change in intensity depending on speed amongst other things. Again, the video accompanying the description explains the usage very nicely. This system incorporates natural interaction very nicely, as any movement by the user is interpreted by the system and converted into a certain output. While this type of interaction does not seem suitable for interacting with specific objects on a screen, it uses the capabilities of both the Kinect and natural interaction to its full advantage.
Design Phase
Concept
Currently, whenever Imagination Studios have a booth at a trade show, they have a very basic setup with some chairs and a TV screen looping their show reel. When all personnel at the booth are in a meeting with a client, potentially interested customers have no way of leaving their contact information and will simply walk past the booth.
Initial design ideas for the project were a general content management system, but when being confronted with the aforementioned problem, the decision was made to adjust the first design to be used as presentation software instead. As Imagination Studios are a motion capturing and animation company, using Kinect to navigate the software seems a logical choice as this incorporates their main business area into the presentation software, immediately giving anybody using the system a feel for what the company is about. It also makes using the system feel more like a game, adding fun to it.
The basic design concept is inspired by life itself. Pieces of information are considered cells, and they can be grouped into topics, called life forms, which means that all life forms consist of 1 or more cells. A vital thought behind the design was to avoid simply adjusting a standard user interface to work with Kinect but instead design a user interface specifically geared towards functioning best with motion capturing.
Design process
Initially, several designs were thought out and sketched on paper using only a pencil. This first phase was important, as sometimes ideas that seemed good at first turned out to be poorly thought out or simply impossible to do when brought to paper. If an idea showed potential, a more detailed design was created, drawing a complete storyboard showing the full extent of the interaction. These storyboards were then used to discuss the design ideas with supervisors and test persons. Two of the later rejected storyboards are discussed in more detail later in this chapter.
The storyboards were shown to several test persons asking for their opinion on which design they considered to be best. Most of them preferred the design using life forms to hold information. During discussions with the project supervisors, the same design was also preferred.
After the decision was made to use the design based on life forms, several video sketches were created. While storyboards are very simple pencil drawings, video sketches are made up of short video clips, photos, both edited and unedited to show the interaction in a more realistic environment.
A sequence of two screenshots from a video sketch are shown below to illustrate.
Figure 1: Screenshot 1 from a video sketch
Figure 2: Screenshot 2 from a video sketch
The last step during the design phase was to create the actual visual design of the system. Storyboard and sketches would only give a very rough impression, and the video sketch was mainly used to explain the final interaction in great detail.
The visual design was done in Photoshop using several images that were then edited and put together to form the final design. Several of these images will be shown throughout this chapter when explaining different parts of the design in more detail.
Gestural Control
The system is designed to be controlled by capturing the body motions of the user by using a Kinect camera. The gestures are strongly inspired by gestures used for touch screens, mainly “Tap”, “Pinch” and “Spread”. This can be done according to Dan Saffer on page 45 (Saffer, 2009) where he writes:
“Patterns for touchscreens can also, in many cases, be applied to free-form interactive gestures, just slightly modified. For instance, the Spin to Scroll pattern can be performed with a finger on a device, but it could also be performed in the air with a finger”
During the design, it was also very important to keep the gestures as simple as possible, as the more complicated it gets, the fewer people will be able to perform these gestures. This is especially important for systems like for example a public kiosk that people rarely use as mentioned by Dan Saffer on page 38 (Saffer, 2009).
To access the cells, or information, within each life form, the user touches the cell and pulls it apart, increasing the size of the life form itself to fill the whole screen and with that making the cells within visible. This is a variant of Dan Saffer’s “Spread to Enlarge” gesture found on page 64 (Saffer, 2009), where both arms are used instead of two fingers. Because the gestural system in place is three dimensional instead of two dimensional like a touch screen, an extra gesture to indicate that the user wishes to interact with the object is required, as failing to do so would randomly activate objects on screen. The gesture used here is a variant of Saffer’s “Tap to Select” gesture found on page 48 (Saffer, 2009). To access the specific topic a certain cell covers, the user uses the same gesture as before. This creates consistency within the system and makes it easier to use. If the user lets go of the life form before opening it fully, for example when he suddenly decides he wants to look at something else instead, the life form will shrink back to its initial size on its own.
To make sure the user doesn’t get confused when controlling the system, two markers on screen will indicate the position of each of the user’s hands. The controls are kept very simple, as the design is explorative, meaning the user should be able to find out on his own how to use the system and enjoy himself while doing so.
To stop working with the information the user is currently accessing, it can be pushed together slightly, and it will automatically shrink again, in the same way it does when a user lets go of it before it is fully opened. This is a variant of the “Pinch to Shrink” gesture described by Saffer on page 64 (Saffer, 2009). Alternatively, the user can simply pull another cell visible on screen towards them, closing the current one automatically and opening up the new one. When having one cell open, the other cells in same life form will float next to it, allowing the user quick access to them. However, when a life form has been opened, the others will not show on screen to avoid information overload and confusing the user.
As these gestures are quite standard and are used in other software already, an alternative gesture system was developed as well. In the latest design, the life forms and cells are represented as soap bubbles. To access information within a soap bubble, the user would simply look at it and take a step towards it. When no longer interested in the information, they would then simply look away and take a step back, letting the bubble shrink back to its original size. Stepping forwards and backwards is a gesture described by Dan Saffer as well, found on page 74 and called “Move Body to Activate” (Saffer, 2009). Using the user’s viewing direction as direct input is not a gesture that can be found yet, however it could be hypothesized that it is essentially a heavily modified version of Saffer’s “Point to Select/Activate” gesture found on page 76 (Saffer, 2009).
Description of Designed Features
Following below is a description of all features designed during the design phase. During the implementation phase however, sometimes features were changed or discarded. This could happen for several reasons. For example, a better idea might have come up while working on the project, or certain ideas proved to be unsuitable when testing the prototype.
4.5 Idle system
Whenever no user is present, the system is in an idle state. While this is the case, it should try to capture the attention of anybody who happens to walk past the booth, get them to stop and watch. The life forms will slowly float around the screen, changing both their positions and the way they look. They may change both shape and color. The picture below shows the initial design for the idle state. The life forms all have different shapes that will keep changing. They also have a caption, clearly showing what information can be found inside them. The Imagination Studios logo is always present, on any screen to make sure the name of the company cannot be missed.
Figure 3: Idle screen showing different menu options
During implementation it was noticed that the design above was not very appealing and should be made much more interesting. Several changes were made, all of which can be seen in the screenshot below.
Figure 4: Idle screen in the actual software
Instead of always showing the full text of the content, only the first letter is displayed. The full text is then only shown when a user moves a hand indicator to move over one of the bubbles. A black background does not seem inviting, and therefore an animated night sky with moving stars and clouds was implemented. This was a suggestion made by an Imagination Studios employee who was testing the system.
User detection
When a user steps into the Kinect control zone, the system greets the user. This is used as an acknowledgement for the user so he knows that the system sees him now and is ready to get input. The life forms will stop moving now to facilitate interaction with the system and to prevent the user having to chase after the information he is interested in.
Data Access
When the user starts to access the information he is interested in, the system will keep track of what he has accessed. This data will later be used if the user requests more detailed information or wishes to be contacted.
The life form the user accessed will grow to fill up most of the screen, showing the cells it contains. It will not change its shape from round to rectangular however. This is to keep the design consistent and by that making sure that the user always knows where he is and won’t feel lost. The cells inside float freely, also changing their form and color randomly. Each cell has a caption, showing what specific topic it contains information about.
Figure 5: Cells floating inside a life form
Accessing a specific cell makes it grow larger. The other cells will still be visible next to it however, to make accessing them easy. A new cell labeled “Detailed Information” will appear as well, enabling the user to request more detailed information, or leave his contact details. Cells will only show basic information, a picture and a headline is all that is needed as nobody is interested in reading much on a screen at a trade show.
During implementation, several changes were made here. The user’s moves are no longer tracked as that information is not actually needed. Also, whenever a cell is being accessed, the others cells are faded out instead, allowing the user to focus on the item he is currently interested in. The other cells fade back in when the user indicates he is done with the current cell.
Contact Information
If a user wants to know more about the topics he has visited so far, he can access the detailed information cell, which will show him a QR-code giving him a link showing more information on everything he has accessed so far. It is also possible to scan a business card, which will then allow IMS to contact the person later. When a business card is scanned, the history of the current user is saved with it to make it easier for the sales department to contact that customer with specific information.
Another way for the user to leave his contact details is to give him an email address using a QR-code as well, to which he could then simply send his vCard. This would not save the history of the current user however.
During implementation the idea for the business card scanner and the personalized link were scrapped in the “Detailed Info” cell were scrapped. Instead, a cell called “Contact” was introduced on the main page, allowing the user to scan the QR-code inside and send his vCard to that email address. This was done to keep everything as simply as possible.
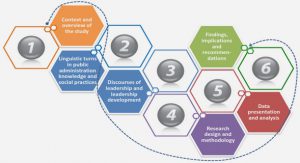
Table of contents :
1. Introduction
2. Project Requirements
3. State of the Art Overview
4. Design Phase
4.1 Concept
4.2 Design process
4.3 Gestural Control
4.4 Description of Designed Features
4.5 Idle system
4.6 User detection
4.7 Data Access
4.8 Contact Information
4.9 Other Developed Ideas
4.9.1 A city of data
4.9.2 The Data Tree
5. Hardware / Used Tools
5.1 Kinect Hardware
5.2 Kinect SDK
5.2.1 Licensing
5.2.2 Featureds
5.2.3 Decision
5.3 Game Engine Comparison
5.3.1 Cryengine 3
5.3.2 Unreal Engine 3
5.3.3 Unity3D
5.3.4 Decision
5.4 Tools
5.4.1 nFringe
5.4.2 Visual Studio
5.4.3 Adobe Photoshop
5.5 Special techniques used during development
5.5.1 Gesture Recognition
5.5.2 Detecting if hand indicators are hovering over a bubble
5.5.3 Using opacity maps for hover effects
5.5.4 Bubbles and Animations
6. Test and Evaluation
7. Conclusion and Outlook
8. References